As you might expect from a handheld that brings portable PC gaming to a lower price point, Valve have opted for the more common UHS-1 standard rather than the faster but more expensive UHS-2. That means you don’t have to spend a lot to get a fast memory card, but it does mean that Valve have had to perform some minor wizardry to keep games loaded onto the Micro SD card feel as quick to load as those on the internal storage.
That leads us onto the recommendations. We’ve focused our efforts on cards between 128GB and 1TB in size, as these currently offer the best value per gigabyte (which we’ve calculated for each pick).
We’ve also looked at each card’s ‘Application Performance Class Rating’, which denotes an increasing level of random read performance, key to reducing game load times. A1 requires a minimum random read of 1500 IOPS, while A2 requires more than double: 4000 IOPS. Finally, we’ve listed the maximum sequential read speed for each card, another indicator of performance.
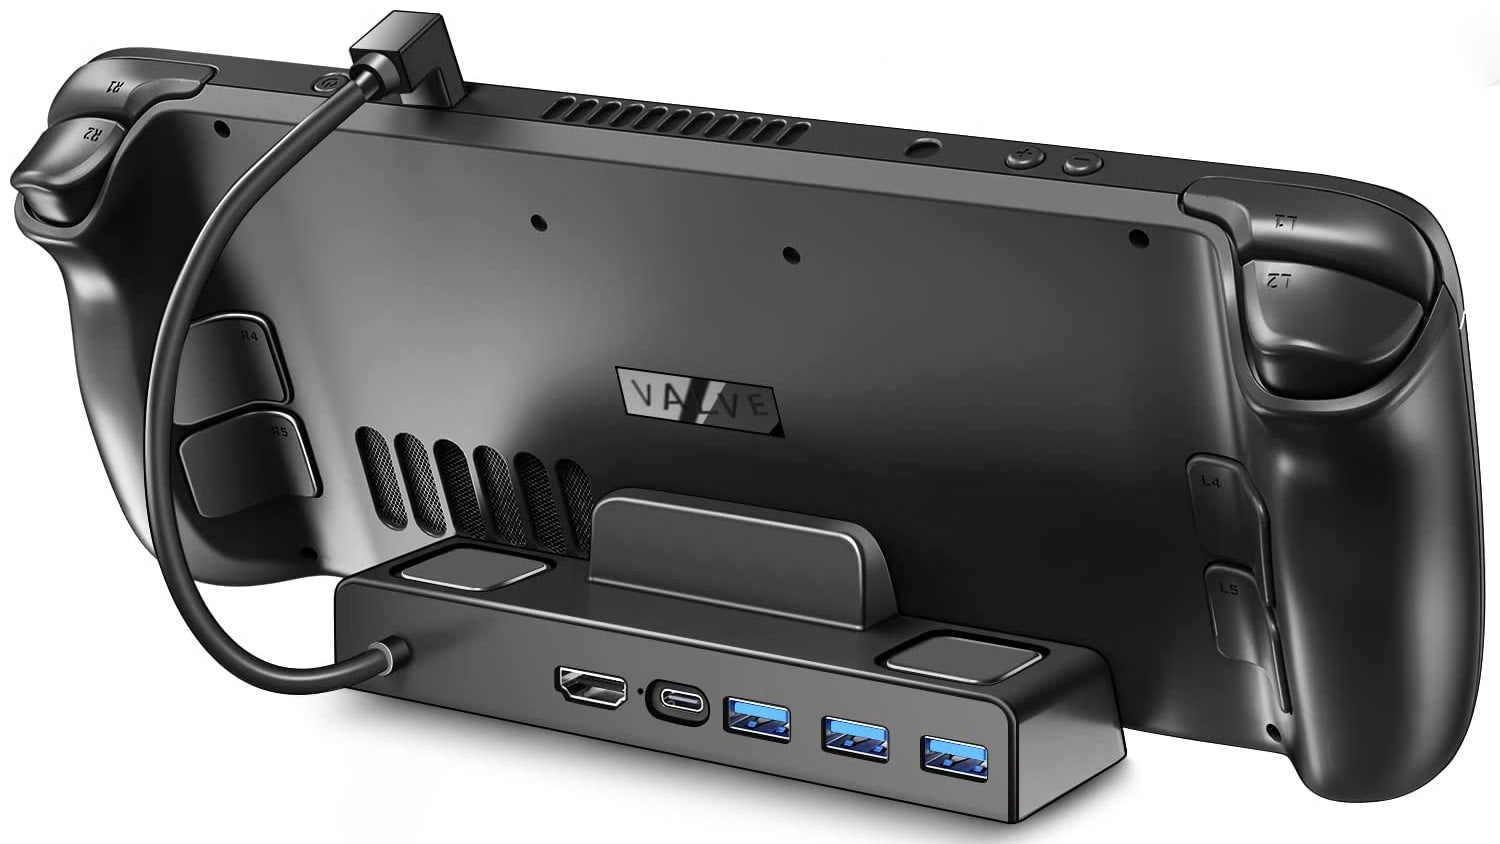
While Valve are planning their own official dock, it’s not been released yet, so I’ve been testing one from iVoler ($35). It’s limited to 30Hz at 4K - not that you’re likely to be running many games at 4K 60fps anyway - but supports a full 60Hz at 1080p and 1440p, resolutions that are more likely to come up. Otherwise, there are three USB-A ports for connecting peripherals, a perfectly-sized USB-C cable for passthrough charging and the aforementioned HDMI, with the dock also supporting the Deck at a convenient angle. It’s much more convenient to use than the standard USB-C multi adapter I was using before for mucking around in the desktop Linux side of the Deck, and well worth the price of admission. The company doesn’t seem to offer the dock for sale in the UK, but a very similar looking model costs £35 here.
How to move games to the SD card on Steam Deck
So once you’ve decided on a micro SD card for your Steam Deck, just how are you moving things around? It’s really easy, with only a couple of menus to navigate. Hit the Steam button and bring up the sliding menu, then choose settings. From here scroll down the settings menu until you get to the storage option. In this menu, you can press the Y button to initiate moving software from your internal drive to Micro SD, or vice versa. You can even press X when highlighting the two storage options to set your preferred default install location. When you eject the Micro SD card, your games installed to that card will disappear from Steam - and when you reinsert it, the games will reappear. This unlocks the door to having different cards with different games; you could easily load up one card with your favourite multiplayer titles, and the other with singleplayer games for example. Of course, going with a higher capacity card means no swapping and an overall simpler solution. We’re looking to run some performance tests on these cards in the near future, but our experience running game load tests on PC and Switch should hold us in good stead in the meantime. Got any questions about Micro SD cards on Steam Deck that we haven’t covered here? Do let us know in the comments below, or talk to @wsjudd on Twitter.